While you may believe harvesting is the final step of growing marijuana, it is certainly not. Growing marijuana doesn’t have one or a few important steps. All the steps are crucial for a quality final product. However, one of the most critical (and probably the most boring) step is the final one; a slow, steady and careful curing process. How to cure cannabis?
It won’t be wrong if we say that harvesting marijuana is just the beginning. You still have to go a long way for that flavorful, smooth, and potent marijuana. The importance of this process cannot be understated. If you don’t give the buds enough time to dry and cure, all the efforts can go to waste.
Don’t worry, there is nothing vague about the process of curing cannabis. It might be lengthy, but it isn’t ambiguous. We will tell you exactly what you need to do. However, before that, we would like to tell you why you need to do it.
Why is it Important to Cure Cannabis?
As soon as novice growers learn that it is important to properly cure cannabis, the first question that comes to their mind is ‘but why?’. You probably have thought about it too. We know because we did. The question of ‘How to cure cannabis?’ comes way after this one. So we thought, why not give you solid reasons for “why you must cure your cannabis”.
Curing Affects the Potency of the Cannabis
Before we jump into the details of how curing can affect the potency of your cannabis, let’s tell you what potency refers to. In terms of cannabis, the potency of a marijuana strain is measured by how strongly it affects the user. This means that the higher the potency, the higher is the effect (recreational or medicinal). Of course, if someone goes through certain lengths to grow cannabis, he/she would like to have a high potency outcome.
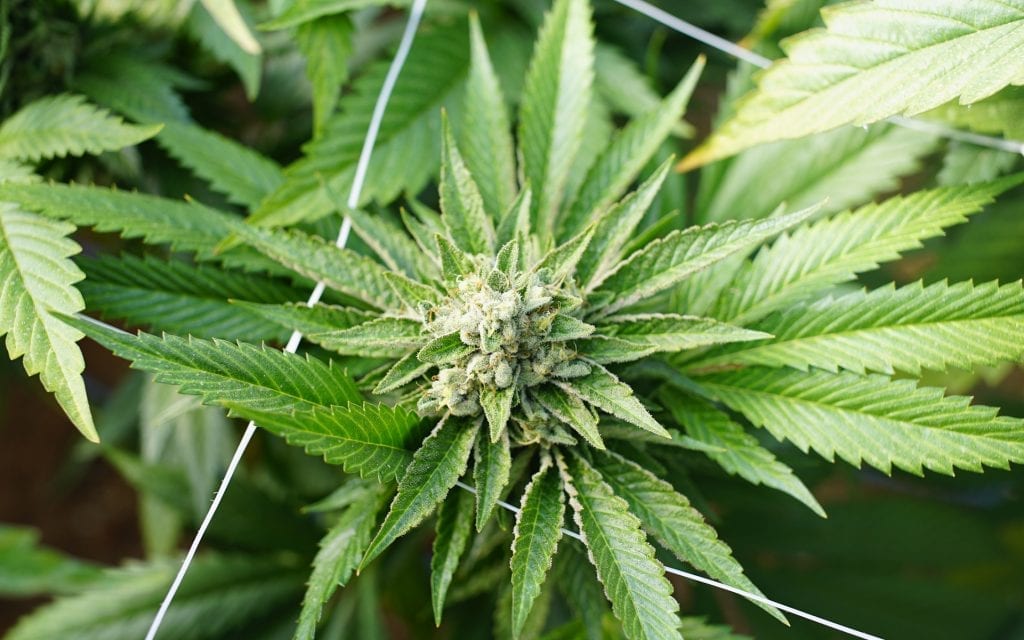
Now, let’s talk about how curing can help you achieve your dream kick. As you probably already know, cannabis contains more than 100 cannabinoid compounds. While all of them have different effects, most prominent ones include tetrahydrocannabinolic acid (THCA), cannabinol (CBN) and cannabidiol (CBD). For people who grow cannabis for recreational purposes, THCA is the most important one. As the plant grows, THCA converts into THC through a process called biosynthesis.
THC is the compound behind the ‘highness’ of marijuana. Hence, greater levels of THC correspond to higher psychoactive levels. Interestingly enough, the process of biosynthesis does not stop even after the harvest. This means that the THCA continues to convert into THC during the curing process. However, this is not the best part.
Get this, if you are careful enough and put your buds under certain conditions, even the non-psychoactive cannabinoids will start to convert into THC. Don’t worry, it is not that hard. You just need to keep your buds in the temperature varying between 60 to 70 degrees Fahrenheit and the humidity levels ranging from 45 to 55%.
Pro-tip: Do not try to quick dry your cannabis. This will stop the process of biosynthesis earlier than it should, and the buds will lose their potential potency. Try to keep the buds away from any kind of light, especially sunlight.
Proper Curing Affects the Taste of Marijuana
Let’s be honest, badly cured weed is not only distasteful but will also hurt your throat. Let’s tell you that when this happens, it is not the plant’s fault, it is the grower’s fault. When you try to dry the buds quickly, they tend to lose all the fragrance and flavor. Why does it happen? We will tell you in a while.
The reason behind cannabis’ wonderful taste and flavor is the natural occurrence of terpenes. However, the otherwise delightful terpenes have only one issue; they are extremely volatile. The plants keep producing them as long as they are alive. However, once you cut down your plant, you need to be very careful to preserve the existing contents of terpene in the buds.
Terpenes can start to breakdown even at a temperature as low as 70 degrees Fahrenheit. Hence, you must keep the harvested buds between the temperature of 60 to 70 degrees Fahrenheit. Always remember, slow and steady wins the race. You do not want your terpenes to break down and evaporate into thin air at the final stage.
Take a slow approach when trying to cure your cannabis as a small mistake can let all your hard work go to waste at the curing stage. The slow curing process also helps in breaking down the unwanted sugars, enzymes, and bacteria, making the buds taste better and smoothing the smoke.
The Benefits of Curing Marijuana for Preservation
After all the hard work you have put in growing cannabis, you might want to keep it long enough. Wouldn’t you hate it if the buds started degrading and losing their cannabinoids before you had a chance to smoke them? Of course, the harvest is going to contain a lot more than you can smoke and you will lose most of it if you don’t preserve it by curing.
Slow curing marijuana can help you in keeping your buds longer than you thought. That’s right. If the weed is cured properly, it can stay in the possible condition up to nearly two years. All you need to do is to keep your buds inside an air-tight container in a cool and dark place. Of course, the buds will age, but it will be for the best. They will age well, just like some old whiskey in a barrel.
Pro-tip: The pro-tip in this process is to keep your cured buds in neutrally charged containers. In simpler words, use a vacuum-sealed glass jar to avoid any confusion. It will keep your buds safe and sound for a long time.
Another important thing is that storing in a cool place does not refer to storing your buds in a fridge or a refrigerator in any way. This will make your trichomes brittle and eventually break off. Similarly, do not store your buds in plastic bags, they will ruin your trichomes.
Also, try to keep your long term storage container away from electronic appliances as they dissipate heat and you know what heat can do to marijuana even in its fully cured form.
How to Cure Marijuana?
Now, it’s time to talk about the essence of this article. We will shortly discuss various popular techniques for drying and curing your marijuana. However, there is a small but critical initial step which we should discuss first. This step is going to serve as a base for some major techniques.
Prep Your Buds by Pre-drying
You can think of it as an “initial drying”. It is connected with how you want to trim your buds. Is it going to be a wet trim or a dry trim? Let’s find out how these two affect your buds.
Wet Trimming
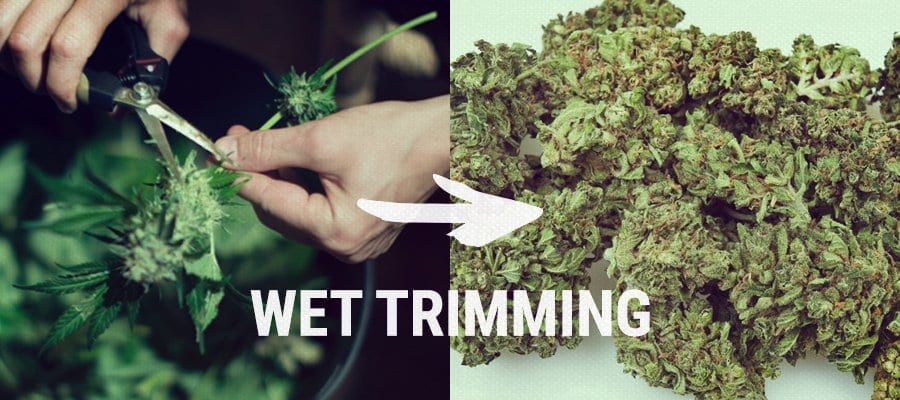
If you decide to ‘wet trim’ your plants, it lets you precisely prune any of the excess plant matter. However, do not forget to keep the sugar fan leaves you cut off if you are interested in making oils and other edibles. After wet trimming your plants, you need to spread your buds on an aerated large surface area such as a drying rack with a trellis.
Avoid using cardboard and plastic drying racks as they can block the fresh air, which can lead to mold development. Similarly, try to place the buds at a distance from each other. They should be far enough to be not touching each other. Over-filling a rack will also result in the development of unwanted bacteria as the sticky resin is home to such plant infections.
Dry Trimming
Most cannabis cultivators use the dry trimming method as this is a much better method when you have a large badge to dry off. The process starts by cutting off the branches ranging between 10 – 15 inches. These branches will have whole buds. You can trim them off once they feel dry. The only disadvantage of this process is that you might lose the smaller sugar leaves as they will shrivel and curl inside upon drying.
No matter which technique you use, just make sure that the drying process takes place inside a dark room. Avoid any kind of light, especially sunlight. It can kill the harvest completely. Also, try to keep the room temperature between 60 to 70 degrees Fahrenheit. Similarly, keep the humidity between 45-55%. Use a dehumidifier if you must. Furthermore, a fan can be used to keep space aerated.
When your buds are ready for curing, you will know. They will look crisp and crunchy on the outside. If you try, you will easily be able to break the smallest branches from the stem upon bending. If they just fold and do not break, they are not ready yet. The probable time they will take to reach the snapping stage lies between 5 to 15 days. Remember, the slower, the better. Do not be too hasty with this process.
Make sure that the conditions are met throughout. If the temperature goes up or the humidity loses balance, the bacteria can find its way in. Keep a regular check for any mildew or mold appearance.
Techniques for Curing Marijuana
Once you have dried your buds, it is now time to start the curing process. The first method is the most famous, being used for a long time. Growers prefer it since it does not involve a lot of fancy tools.
It is also probably one of the reasons why it is considered the best way to cure cannabis. We have added two other popular methods too. You can also try them if the easier method does not fancy you.
The Conventional Method to Cure Cannabis
All you need to have for this step is a few vacuum-sealed Kilner jars. They are easily available in the market so you won’t have any problem in finding them. You can also use jam jars or mason jars if they are air-tight and are properly sterilized.
Once your buds pass the snap test and are dry to the touch, gather all the buds you can by snapping them off the branches. Now, open the jars and start filling the 2/3rd of the jars with these buds. Do not close the lid or clamp it down in case of Kilner jars. Instead, keep it loose and store in a dark cool place.
Do you wonder why your buds still need air? It is because the biosynthesis is still going on. This means that non-psychoactive cannabinoids are converting into THCA. This will further break down into THC and add high potency to your buds. The unwanted sugar will also break down during this period, resulting in a better smoke.
At the initial stage, make sure to check your buds twice a day for any mildew or mold. At the later stages, checking once a day will suffice as with curing, the chances of getting an infection lowers. Check the buds keenly by taking them out of the jar. Pick off any bud that is moldy as it can affect others.
Your badge will be ready within two or three weeks. However, a longer curing period is advantageous. This can thoroughly improve the taste and flavor of the smoke. Take note that this is not the case in all type of strains. Sometimes, some strains can even take months to get properly dried and cured. Hence, do not forget to research on how much time your particular strain will take while curing.
Pro-tip for Using Conventional Method
Use a trick to make the buds dry out in an even manner. After the mold inspection, while putting the buds back in the jar, make sure they are in a different position. This also helps in reducing the risk of mold formation.
Use Water to Cure Cannabis
While it may sound odd, but you can use water to cure your cannabis as well. You might be thinking about how would you use water after drying the buds. Do not worry, we will explain it well. You might end up liking this method more than the conventional method.
This process usually starts before the drying process. It is better than the above-mentioned method in a way that it removes a wide array of unwanted bodies that may keep lingering in your buds if you use the general method.
Water can help greatly in flushing out impurities during the final stages of curing. It can help in improving the taste and smoothing out the smoke. However, this method might reduce the flavor of your buds a little bit.
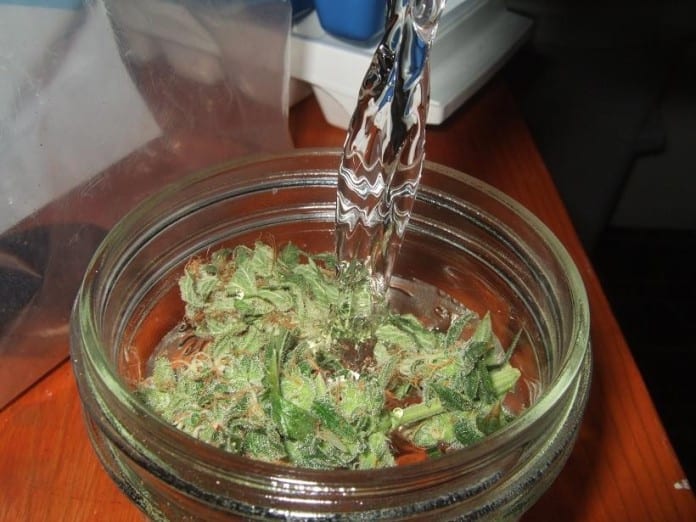
In this process, you will still use the Kilner or Mason jars. However, this time, they will be filled with water. You will place the buds submerged in the water for about a week. The water will help in breaking the unwanted sugars and enzymes. As the THC is fat-soluble, you do not have to worry about losing any of it. It might increase the potency of your buds.
Do not forget to change the water every day so that the impurities are flushed out. After 7 to 8 days, your buds will be ready for drying. Also, keep checking the buds for molds and mildews, as with this method, they are more prone to infections.
Pro-tip: It is better to use distilled water rather than using tap water as it will be free from any unwanted contaminants.
Cure Cannabis with Dry Ice
This method has a high chance of becoming the most popular method in upcoming days as it does not use light, heat, or air to cure cannabis. All of them can reduce potency if not kept under control. Dry ice is widely available. This process does not ask for much except taking a little extra care. Dry ice is frozen CO2 hence you might want to keep yourself from touching it directly.
In this process, you need a wide container, large enough to store the buds you want to dry altogether. Fill half the space with buds and the remaining half with dry ice. Cover this container with a cotton cloth and place it in the freezer. Avoid any source of light, air, or heat. Keep a small opening to let the gas out as it evaporates from the dry ice.
The water will come out of the buds within 24 to 48 hours as a result of sublimation. However, you might need to add more dry ice with time as needed. In this method, you might lose some trichomes but will be left with highly potent, flavorsome. and tasteful buds.
Final thoughts on Curing and Drying Weed
In conclusion, curing cannabis is one of the most crucial parts of growing cannabis at home. All you need to do is to take it slow, maintain the conditions, and use the right method. If all the conditions are met, curing will lead you to a highly potent and full of flavor outcome.
Remember that in the whole curing process, patience is a virtue. You do not have to be an experienced grower for a wholesome final product. Giving it time will pay-off big time.
Table of contents


