Are you living in a place where the weather conditions are not suitable for healthy gardening? If yes, there is no need to worry – you can still enjoy your hobby by making your very own diy grow box. Before we continue to talk about how to create a grow box with ease, let’s first find out, “what a Grow Box actually is?”
What is a Grow Box?
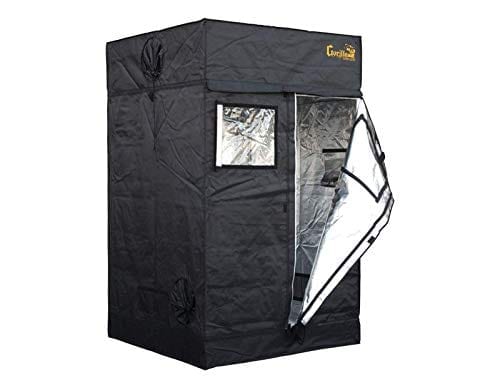
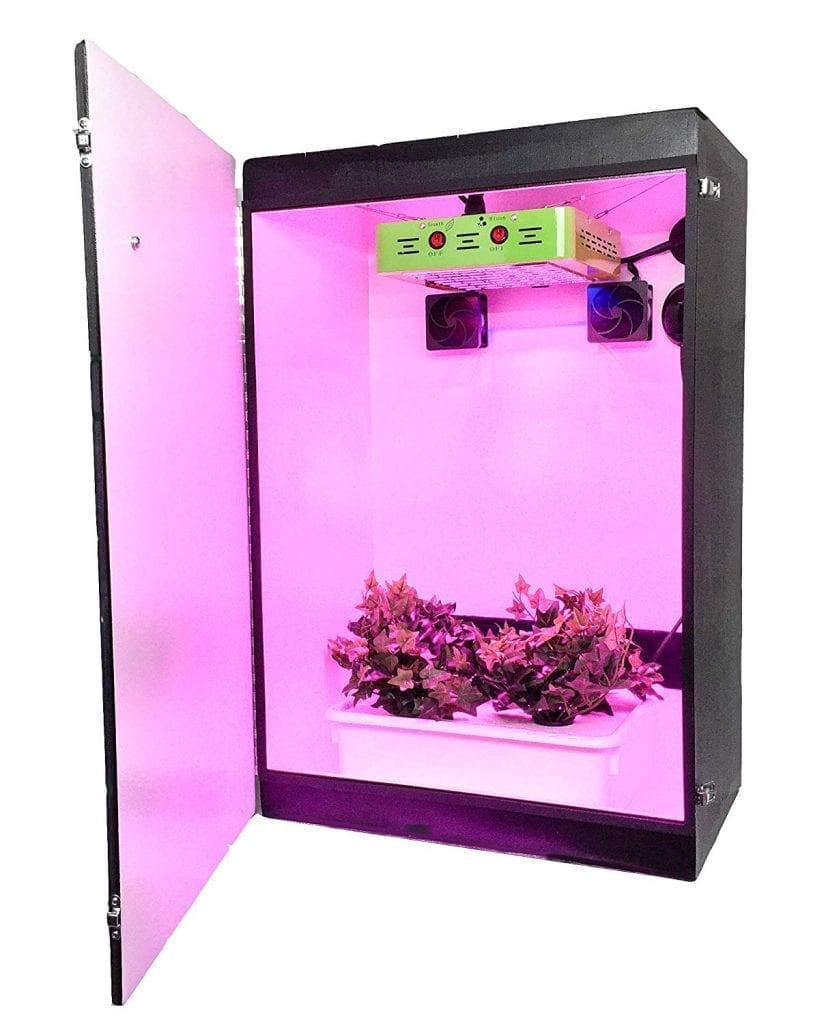
A grow box is a system that helps you grow plants indoors. It is a partially or entirely enclosed system that promotes the growth of plants without access to natural light.
Why Do You Need it?
There are several reasons to create or install a grow box. For example:
- Unavailability of sunlight
- lack of outdoor garden space
- willingness to grow vegetables during cold weather
- protection of plants against diseases or pest
The size of a grow box varies. Even though there are plenty of brands offering different sizes and styles of grow boxes, you can always make one at home. You can custom make one based on your unique requirements, based on the type of plants, type of soil you want to use, or hydroponic system you want to install.
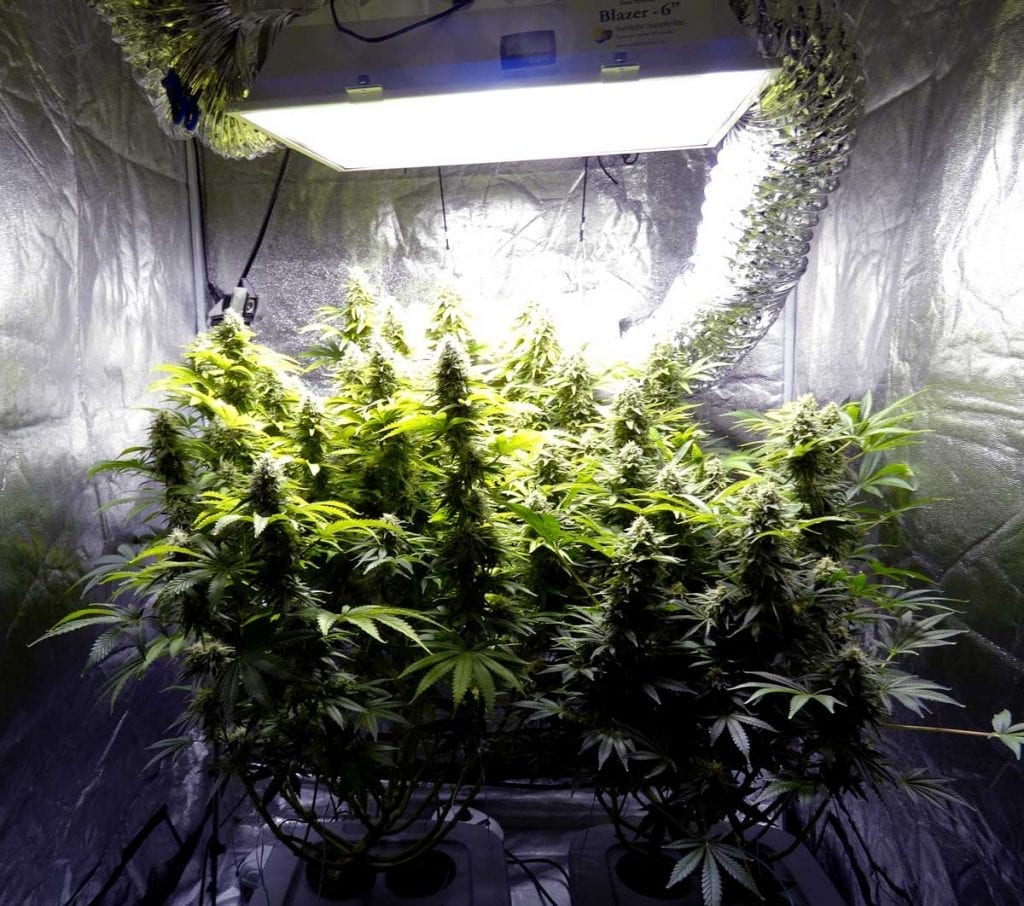
A grow box is mainly enclosed, which is why it contains a grow light (an alternative for sunlight for photosynthesis) along with an exhaust system for the easy exchange of gases to improve the growth. In a hydroponic system, the water includes a nutrient-rich solution along with an odor control filter that makes sure the plants are healthy.
In some grow boxes, advanced conditions are used that include air conditioning to regulate temperatures. CO2 fillers are also used to increase the growth rate of the plant.
In simple words, a grow box allows you to control all the conditions needed for the growth of the respective plant. These include light patterns, nutrition levels, temperatures, airflow, and several other factors.
The Basic Parts
Constructing a grow box is not rocket science. However, there are some pieces of equipment that you cannot miss out on. The different pieces of equipment involved all have their own significance that helps provide conditions to make plants grow healthy and fresh.
Here is a small list of some of the basic equipment that is involved in Grow Box.
Carbon Filter. Carbon filters are available in different sizes and dimensions. They make sure the air is clean by preventing gases from accumulating around the growth area.
Lighting systems. The lighting systems basically make up for the sunlight. LED, CFL, and HID are the common types used in grow boxes. They allow users to control the energy and temperatures according to the seasons for active plant growth.
Hydroponic systems. Hydroponic systems are used as an alternative to the soil. The nutrient solution allows the availability of nutrients for plants to consume, resulting in better yields. There are several types of Hydroponic systems that include deep water culture, drip irrigation, etc.
Ventilation. To construct a ventilation system, a rotating fan or induct fan is used. These allow for circulation of air to regulate humidity and temperature.
Carbon dioxide systems. For plants to grow photosynthesis requires CO2. For this, tank systems and cans are used that slowly release a controlled amount of CO2.
Water filtering system. Another major component of plant growth. Water filtering system controls nutrient solution to get rid of particles that would inhibit growth. There are numerous types of water filtering systems available to choose from.
How to Build a DIY Grow Box Step by Step
If for any reason, like low sunlight or inadequate space, you cannot grow plants in an outdoor setting, here is a step by step guide that will help you create your own Grow Box at home for indoor gardening.
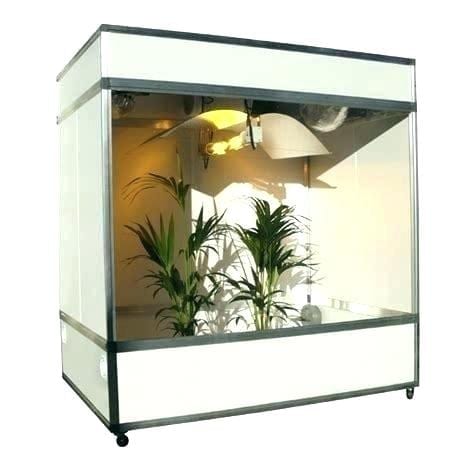
Here are some of the essential equipment you need.
- Wood for frames
- Wheels for mobility
- A piece of glass to separate the grow chamber with the lighting chamber
- Fans for ventilation
Step 1: Making the Basic Frame
The first thing you need to do is decide on the size. Determine exactly how large do you want your DIY grow box to be before you buy additional equipment. It is up to you to decide about the type of material you want as your basic frame. The most common material is wood since it is easy to cut and is not very costly.
You can also make a basic 3D frame on software called Google SketchUp. This program is easy to use. It will help you create a box with required dimensions, so you know the available space to adjust the additional equipment in.
To begin with, you require MDF sheets along with Caster wheels and bolts to help with the joinery. Once again, the type of joinery is up to you. Make a template or a prototype on a chart paper before you begin the wood cutting. This might take time but will make sure you do not make any cutting issue and waste wood.
If you are making the grow box for your own personal use, a 4-inch-tall box will suffice. You need to make two front panels, two side panels and two panels for front and bottom. You can always refer to your Sketchup file in case you get confused regarding the assembly.
Step 2: Closing
The next step is where you enclose the grow both. This is where you attach the side panels by making use of mylar on the panels. Using mylar will make it airtight preventing any exchange of gases. It will secure it neatly. If you want, you can add wheels to your grow box as well.
You can insert wheels in the first step or the second. Flip the caster upside down and drill holes on the marked position. Insert the nuts, washers, and bolts, and your grow box is mobile.
Step 3: Preparing for ventilation
The basic frame of our grow box is complete, which brings us to the next stage, where we plan the ventilation process in the Light Chamber. You can also make use of computer fans that will work perfectly fine for such a small place.
If you have a frame that is 4 inches tall, then the fan would be primarily 80 x 80 x 25 mm. The number of fans you want to use also depends upon the plant you are trying to grow. Ideally, for a grow box for domestic use, two fans are enough with a 12v power and airflow of 26.8 CFM.
To insert the fans for the ventilation, make use of a hand drill machine. This way, you can make a hole of no larger than one inch with ease. Cut out the notches by a saw. You can also make use of any other equipment that you are comfortable with. The fans should fit right into the holes. If there is any space uncover, you can fill it later.
- Wiring Fans
Next comes the stage where you need to handle the wiring of the two fans you just installed. Get a universal power adapter that will regulate the amount of voltage for your fans. For wiring, you can use RCA cables.
Use wires with an increased length so that you can easily accommodate it. Wrap the wires with electrical tape to keep it secure. Since you will be using water, the wires must resist moisture so double coat the wires with electrical tape.
Place the exhaust in the front upper corner while the intake should be on the lower back. There will be a piece of glass that would separate the lighting chamber with the grow chamber.
Connect the two fans with wire and attach it with the power adapter.
Step 4: Adding the light chamber
Next is the step where you must provide light for the photosynthesis. You can use a Metal Halide MH lamp that provides a moderately balanced light spectrum close to natural light. Metal Halide plant grow lights make a good option for primary light to make up for natural light.
Moreover, you can also use High-Pressure HPS plant grow lights, which emit orange and yellow light. They are more energy-efficient than regular Metal Halide MH lamps.
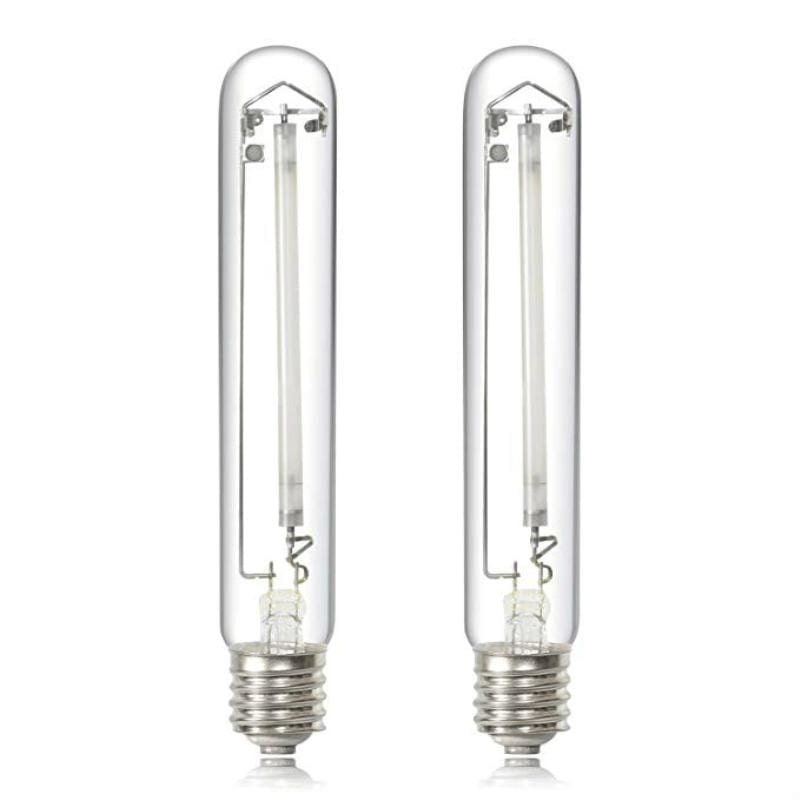
Simply put, when it comes to grow lights, there are plenty of options available in the market to choose from.
Step 5: Air Filter Ventilation
For this step, you need chicken wire. The amount of wire you require depends upon the size of your grow box. Zip tie the chicken wire next and use panty-hose to keep the activated carbon in place. Use two of the fans on the side where you will place the intake while the exhaust will go on the rectangular part.
You will need activated carbon and some duct tape to seal the ends so that the air passes through the carbon. Place the fans in the grow chamber so that they don’t disturb the light from the top. You can install air ventilation by cutting one hole for the squirrel exhausts and using the same hole as a reference for the next. Make sure all the holes are airtight. You can ensure that by using duct tape so that unfiltered air does not escape the grow chamber.
Step 6: Adding Light in the Grow Chamber
After the fans are installed, you are required to install some CFLs. These are an excellent option to use in the early stage of growth. You can use two bulbs of higher spectrum up top and one of the lower spectra on the bottom. Three bulbs are enough for one or two plants. You can increase the number of bulbs according to the size of your grow box.
Step 7: The Final Stage
This is the final stage where you need to put it all together. Make sure the wiring is connected to an adapter so that your grow box does not get more voltage than required. You can cut the wire from the computer fans and adjust it with the adapter as well.
Make sure you test all the equipment first before you assemble it all. The power and voltage of the equipment you are using depend upon the scale you are working with.
Best Grow Box for Beginners
There are multiple ways to control the growing environment of your plant. A grow box can help monitor a self-reliant grow space that would aid you to have an indoor growing system.
Here are some systems with varying styles beginners can explore to grow exotic plants, vegetables, herbs, or flowers. Take a look!
Basic DIY Grow Box
You can install a basic DIY grow box in a place at home which you do not use anymore. It is a good option to grow whatsoever from seed to cannabis without a need to change the location. You cannot shift the seedlings into a bigger space once the stealth grows out of the designated place.
All the basic equipment is used for this stealth grow box for beginners.
You simply have to turn a vacated place in your house into a grow box. It is a very basic grow box design which you can customize from outside later to make it look aesthetically pleasing.
An Old Dresser Turned
Do you know you can make a stealth DIY grow box from an old dresser? Do not let your own furniture go to waste when you can use it to prepare a hidden grow area for your plants.
To make a beginner grow box from an old dresser, there are some simple steps that you need to follow. First, disassemble all the drawers except the topmost shelf where you will insert exhaust fans. Next, you would have to attach one of the drawer’s bottom to the front of the first dresser you have chosen.
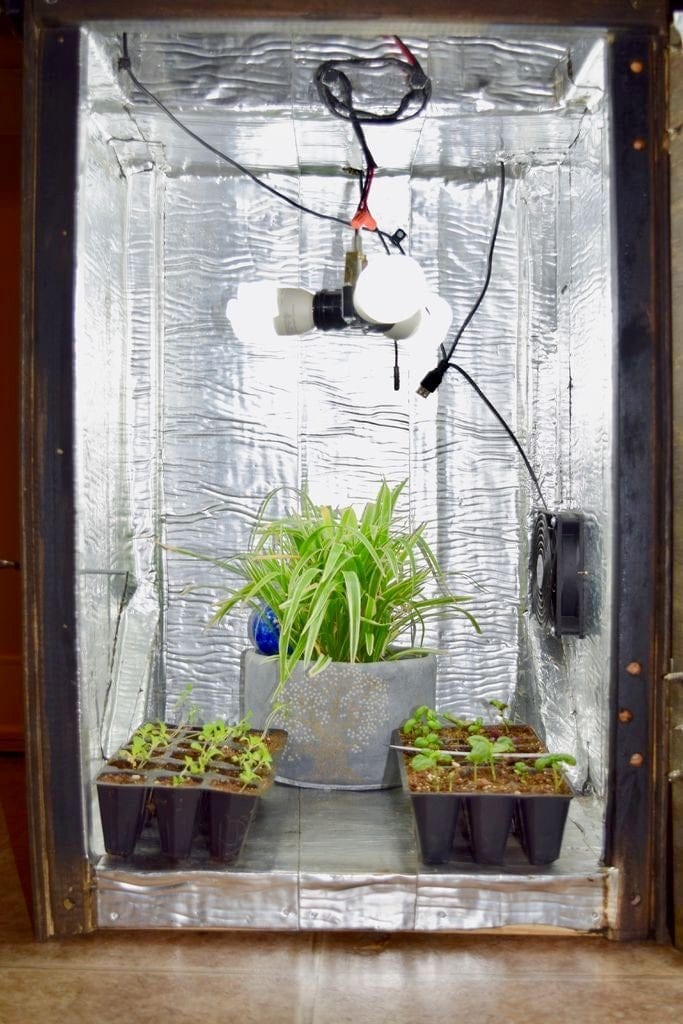
The power of the fan you use depends upon the type of plant you are growing. Make a partition wall which will have a hole cut out in the middle. Make two additional holes to install the fans. After installing fans, insert lights in the two designated sections, flower and vegetable section. Screw four pieces of woods to the floor of the dresser. You would also have to attach glass. Take care of the wiring by using a power adapter.
Old PC Turned
Turning old PC into a DIY grow box is also an interesting option. The obvious first step is to remove all the components of the PC. Clear the place and drill holes for installing light and fans. Make sure you seal the holes with duct tape to avoid any exchange of gases. Paint the inside of the PC to give it a finished look.
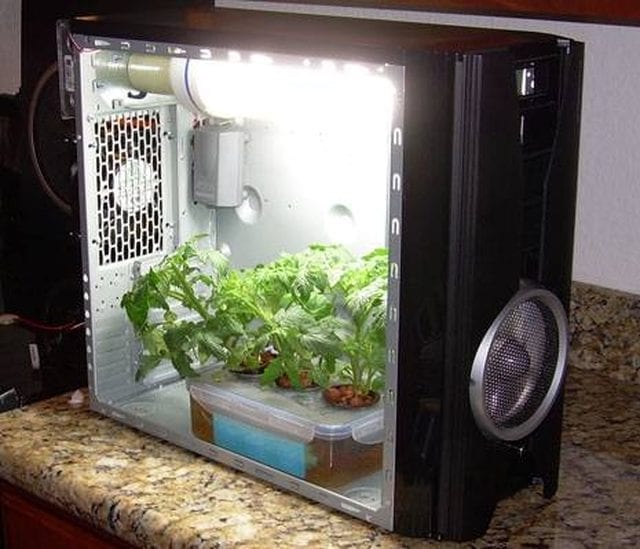
Install fans, standard light bulbs, and CO2 filter material. Manage the wiring and wrap the electric tape around for safety purposes. You can also place a timer and switch on the system. Place growing fixtures and plant seeds to begin the planting process.
The Pros and Cons of Indoor Growing Systems
Most of us fancy good indoor growing systems, especially if we have not practiced anything like that before. However, maintaining stealth grow box is not everyone’s piece of cake. Before you plan on making a grow box, you must learn about what hydroponic system is, the benefits and the downsides.
Here are some of the advantages and disadvantages of a grow box that will help you decide whether you should start one or not.
Advantages of Grow Box
Here are some of the key benefits of a grow box.
Soils not Required
The major advantage of grow box is that you can grow vegetables or plants without needing soil. It helps you grow food in places where the weather conditions are not quite supportive.
Can be Performed in Any Space or Location
A grow box can be made in a house, apartment, or even inside an old dresser. Hydroponic provides a system where the roots are sunk. The tank provides all the nutrients to the plants to grow fresh and inside a limited space.
Fewer Pests
Not having soil means no pests and diseases. This saves on the extra time, energy, and money you have to spend on taking care of the plant, ensuring it is safe from pests. Indoor growing systems provide a great system that can you can easily control according to your needs.
Saves Water
One major advantage of a diy grow box is that it saves on water as these grow boxes recycle water.
Disadvantages
Not everything is perfect with grow boxes, here are some limitations.
Requires Commitment
Beginners should be aware of the fact that the grow box is not something that will yield results too soon. It will require patience. You need to have a positive attitude that includes taking care of the plant a lot more in the start to ensure stable growth.
Organic Debates
There have been numerous arguments concerning whether hydroponics is organic or not. People have raised numerous concerns regarding how healthy are the plants that grow in a closed system are.
Extreme Safety Precautions Needed
In the grow box, you are working with water and electricity. This is where one needs to be extremely vigilant and take care of every possible safety measure. Beware of electricity and its close proximation with water.
Table of contents


